How To Refinish Kitchen Cabinets | With Stain | With Paint | Without Sanding | That Are Not Wood | With Polyurethane
The Ultimate Guide to Refinishing Kitchen Cabinets Like a Pro
Without having to pay for a complete remodel, refinishing kitchen cabinets can give your space a new lease on life and a contemporary appearance. Whether you're working with non-wood cabinets or stain, paint, polyurethane, or no sanding in mind, this article walks you through all the necessary processes and considerations to help you achieve a professional finish. Let's examine each technique in more detail to make sure your kitchen cabinets look amazing and last for many years.
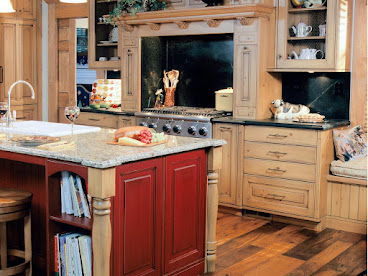
Refinishing Kitchen Cabinets with Stain
A great technique to bring out the inherent beauty of wood and give your kitchen more depth and richness is to stain your kitchen cabinets. This is how you do it:
Materials Needed
- The wood stain of your choice
- Sandpaper (120-grit and 220-grit)
- Tack cloth
- Wood conditioner (optional)
- Paintbrush or clean cloth
- Clear polyurethane finish
Steps to Stain Kitchen Cabinets
- Preparation: Take out the cabinet doors and hardware. To get rid of grease and grime, properly clean the surfaces.
- Sanding: To smooth out the wood and remove the old finish, lightly sand the cabinets using 120-grit sandpaper. For a finer polish, use 220-grit sandpaper afterwards.
- Cleaning: Use a tack cloth to dust off the sanded surfaces.
- Conditioning: If the wood is prone to blotting, use a wood conditioner. This process guarantees a uniform stain distribution.
- Staining: Apply the stain along the wood's grain with a brush or clean cloth. To get the desired colour, remove any extra stain by wiping it off.
- Drying: Follow the manufacturer's recommendations and let the stain dry.
- Sealing: To preserve the wood and bring out the colour of the stain, apply a clear polyurethane finish. For a smooth finish, sand in between applications after applying a minimum of two coats.
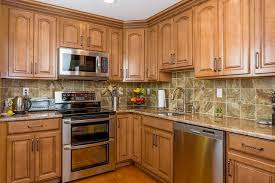
Refinishing Kitchen Cabinets with Paint
For a total makeover, painting kitchen cabinets is a popular choice. This is an adaptable solution that works with any type of kitchen design.

Materials Needed
- Degreaser or TSP cleaner
- Sandpaper (220-grit)
- Primer
- Paint (latex or oil-based)
- Paintbrush and roller
- Clear polyurethane (optional for extra durability)
Steps to Paint Kitchen Cabinets
- Preparation: Take out the cabinet doors and hardware. Use a degreaser to wipe away any dirt or grease from any surfaces.
- Sanding: To prepare the cabinets for priming, lightly sand them using 220 grit sandpaper. Dust off with a tack cloth wipe.
- Priming: Apply a primer that is appropriate for the material of your cabinet. Better paint coverage and adhesion are ensured by this procedure. Give the primer time to fully dry.
- Painting: Use a roller to apply paint to broad surfaces and a brush to apply paint to detailed areas. Make sure to apply two coats or more and let them both completely dry.
- Sealing: Overcoat the paint with a transparent polyurethane for increased longevity, particularly in high-use areas. While not necessary, this step is advised for a durable finish.
Refinishing Kitchen Cabinets with Polyurethane
Paintless and stained cabinets alike can benefit from the long-lasting, protective coating that polyurethane offers. Here's how to put it to use:
Materials Needed
- Sandpaper (220-grit)
- Tack cloth
- Polyurethane (water-based or oil-based)
- High-quality brush
Steps to Apply Polyurethane
- Preparation: Prepare the cabinets by cleaning them and making sure there is no dust or moisture on them.
- Sanding: To smooth the surface, lightly sand the cabinets using 220-grit sandpaper.
- Cleaning: Take out all the dust and debris using a tack cloth.
- Application: Use a high-quality brush to apply the polyurethane, making long, even strokes. Try not to overwork the finish to avoid bubbles.
- Drying: After letting the initial layer entirely dry, give it a quick sand with 220 grit sandpaper.
- Extra Coats: Sand in between each of the two coats that you apply. This procedure guarantees a glossy, long-lasting finish.
Refinishing Kitchen Cabinets Without Sanding
There are fewer labour-intensive options available that nevertheless produce stunning effects if you wish to bypass the labour-intensive sanding process.

Materials Needed
- Liquid deglosser
- Tack cloth
- Primer (bonding primer)
- Paint or stain
- Paintbrush or roller
Steps to Refinish Without Sanding
- Preparation: Take out the cabinet doors and hardware. Make sure all of the surfaces are clean.
- Deglossing: Use a liquid deglosser to take off the previous finish from the cabinets and prepare the surface for paint or stain. Regarding application and drying durations, adhere to the manufacturer's directions.
- Priming: Apply a bonding primer made specifically for glossy surfaces for priming. This is an important phase in paint adhesion.
- Painting or Staining: Use the paint or stain of your choice. For complete coverage, paint requires at least two coats. Use the staining section's instructions as a guide.
- Sealing: To safeguard the just installed surface, if preferred, use a clear polyurethane finish.
Refinishing Kitchen Cabinets That Are Not Wood
Different methods are needed if your cabinets are constructed of materials other than wood, including metal or laminate.
Materials Needed
- Degreaser
- Sandpaper (220-grit) or sanding sponge
- Primer (specifically for non-wood surfaces)
- Paint or stain suitable for the material
- Paintbrush or roller
Steps to Refinish Non-Wood Cabinets
- Preparation: Use a degreaser to give the cabinets a thorough cleaning and get rid of any residue.
- Sanding (if necessary): To improve adherence, lightly sand the surface using 220-grit sandpaper or a sanding sponge to create a rough texture.
- Priming: Use a primer made specifically for the type of material (metal, laminate, etc.) that your cabinets are made of. Give it time to dry completely.
- Painting or Staining: Use the right paint or stain application. To guarantee consistent coverage and avoid drips, apply several thin layers as opposed to one heavy coat.
- Sealing: To protect the surface and increase longevity, use a clear polyurethane finish.
Tips for a Professional Finish
Whichever technique you decide on, the following advice will assist you in getting a polished finish:
- Operate in a Dust-Free Setting: Make sure your work area is dust-free and spotless to prevent finish flaws.
- Make Use of High-Quality Materials: Invest in premium brushes, paint, and stain for a longer-lasting, smoother finish.
- Take Your Time: Do not hurry the undertaking. To guarantee the greatest outcomes, give each step enough time to dry.
- Test First: To make sure you are satisfied with the colour and finish, always test the finish you have chosen on a tiny, discrete area.
- Maintain Your Cabinets: Following refinishing, keep your cabinets in good condition by giving them regular cleanings and taking quick care of any damage.
In summary
Choosing to refinish your kitchen cabinets with polyurethane, paint, or stain can significantly improve the appearance of your space. You don't have to do a whole kitchen makeover to create a gorgeous, polished look by following the instructions in this guide. Your remodelled cabinets will be a monument to your diligence and attention to detail, regardless of whether you choose to sand them or not and whether you choose to deal with wood or non-wood materials.
Happy refinishing!


Comments
Post a Comment