How To Paint Kitchen Cabinets | Professionally | With Sprayer | With Laminate | Without Sanding
How to Paint Kitchen Cabinets Professionally: A Complete Guide?
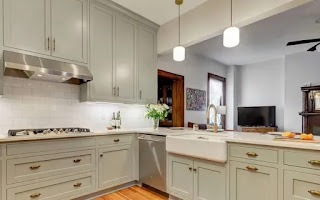
Do you want to significantly improve your kitchen? Think about taking up kitchen cabinet painting. Even though a costly kitchen renovation might be out of the question, painting your cabinets can bring fresh life and brightness to your room. Most committed do-it-yourselfers should feel comfortable taking on the simple, if time-consuming, DIY makeover of painting kitchen cabinets.
Painting kitchen cabinets may be a very transforming activity that can make an outdated kitchen seem new and contemporary. If you're thinking about taking on this endeavour, there are a few important things to think about using a sprayer, handling laminate surfaces, and whether or not to sand. All of these crucial aspects will be covered in this guide as it leads you through the professional painting of kitchen cabinets.
Why Paint Your Kitchen Cabinets?
Painting your kitchen's cabinets can:
- Save Money: Cabinets can appear brand-new with a fresh coat of paint without having to be replaced.
- Modify Style: Adjust the hue to reflect your own taste or the newest fashions.
- Boost Property Value: A contemporary kitchen may add a lot of value to a property.
Tools and Materials You'll Need
Tools
- Paint sprayer
- Screwdriver or drill
- Sandpaper (120 and 220 grit) or a deglosser
- Painter’s tape
- Drop cloths
- Tack cloth
- Paintbrushes and rollers (for touch-ups)
Materials
- Primer (suitable for your cabinet material)
- Paint (latex or oil-based, preferably a cabinet-specific paint)
- Degreaser
- Wood filler (if needed)
- Clean rags
- Protective gear (gloves, mask, goggles)
Step-by-Step Guide
Step 1: Preparation
- Remove Cabinet Doors and Hardware: Take out all of the drawers, cabinet doors, and hardware first. Using masking tape, mark the location of each door and its associated door for simple reassembly. Keep the hardware and screws in a secure location.
- Clean Thoroughly: Grease and dirt can gather in large quantities in kitchens. To completely clean all surfaces, use a degreaser. This is an important step in making sure the paint sticks well.
Step 2: Decide Whether to Sand or Not
- When to Sand: Sanding is advised if the wood or wood veneer in your cabinets has a rough texture or a glossy finish already in place. After lightly scuffing the surfaces using 120-grit sandpaper, smooth the finish with 220 grit.
- When to Skip Sanding: If your cabinets are laminate or the finish is still in good shape, you can use a liquid deglosser in place of sanding. This substance aids in the adhesion of the fresh paint by removing the glossy finish.
Step 3: Priming
- With Laminate: When working with laminate cabinets, priming is extremely crucial. Select an excellent bonding primer meant for glossy surfaces. Using a paintbrush or roller, apply a thin, equal layer.
- Without sanding: Using a high-quality bonding primer becomes much more important if you neglect to sand. Make sure you apply the primer completely as instructed. Before proceeding to the following stage, let it thoroughly dry.
Step 4: Painting
Using a Paint Sprayer: It's difficult to get a polished, even finish using brushes or rollers, but a paint sprayer does. This is how you do it:
- Establish a Spray Area: Guard surrounding areas using painter's tape and drop cloths. If it's feasible, think about putting up a spray booth.
- Thin the Paint: The paint may need to be slightly thinner for the sprayer, depending on the type. As directed by the manufacturer.
- Practice: To obtain a feel for the spray pattern, test your sprayer on some cardboard or leftover material.
- The application of spray to the cabinets: The sprayer should be held 10 to 12 inches away from the surface. Make lengthy, steady passes, beginning at the cabinet's edge and continuing across it in one continuous motion. Give each pass a small overlap.
- Dry and Recoat: Give the initial coat enough time to completely dry. For the smoothest finish, carefully sand between layers with 220-grit sandpaper before applying a second coat.
Using Laminate: Apply the same method to laminate cabinets, only make sure the paint is meant for laminate surfaces. Generally, the best options are oil-based or acrylic paints of superior quality.
Step 5: Reassembly
Hang the cabinet doors and replace the hardware after your last coat of paint has dried fully, which should happen in 24 to 48 hours. Be cautious not to scratch the freshly applied paint while doing this.
What Type of Paint Do I Need for the Cabinets?
Oil or latex?
- Some pros have stopped using oil-based paints totally because latex paints have been getting better over time. Latex paints are easier to work with than oil-based paints since they dry faster and wipe clean with water. However, a lot of experts still recommend oil-based topcoats, claiming that they level out to a smoother finished surface and create a tougher, more resilient paint coating. Additionally, latex paints require up to three weeks to properly cure in comparison to oil-based paints. They are vulnerable to harm while this is going on.
- In summary, either latex or oil will produce a high-quality finish. When using latex paint, make sure it is made entirely of acrylic as this type of paint offers better adhesion and durability than vinyl acrylic paints.
Brush or Spray Paint?
- The smoothest alternative is a sprayed-on finish, but applying it correctly requires practice. Along with having to mask off all the kitchen surfaces that could unintentionally get sprayed—including worktops, cabinet interiors, and appliances—you'll also probably need to rent the spray equipment, which raises the expense of the project. This takes time.
- We advise you to use premium brushes in its place for these reasons. Get an angled brush in the 2½- or 3-inch-wide range to help you get paint into the corners of doors with moulding and to coat door frames in a single pass. You should also invest in a decent square brush, whose straight ends will quickly handle large, flat panels. Oil-based paint should be applied with a natural bristle brush; latex paint should be applied using a synthetic bristle brush that does not absorb water.
Some Advice for a Skillful Finish
- Operate in a Dust-Free Setting: The flawless surface of your paint might be ruined by dust. Work in a spotless environment, and before painting, try wiping down surfaces with a tack cloth.
- Make Use of High-Quality Materials: Make a quality paint and primer investment. Cheap materials could not be as durable and have a worse finish.
- Have patience: Let paints dry completely in between coats and before assembling. Smudging and other flaws may result from rushing the process.
Common Mistakes to Avoid
- Skipping the Prep Work: For a long-lasting finish, proper cleaning, sanding, and priming are necessary.
- Applying Incorrect Paint: Certain paints are not meant for cabinets, particularly those made of laminate. Make sure the product you're utilising is intended for high-traffic locations.
- Not Enough Air Ventilation: It's essential to paint in an area with good ventilation for both your safety and the proper curing of the paint.
How to Care for Your Painted Cabinets?
To maintain the new look of your freshly painted cabinets:
- Maintain Regular Cleaning: Use a moist cloth and light detergent to clean cabinets. Steer clear of strong chemicals.
- Touch Up as Necessary: Save some of the excess paint in case the cabinets peel or scrape.
- Steer clear of Excessive Moisture: When cooking, use exhaust fans to remove moisture that could harm the paint.
In summary
It may seem intimidating to paint your kitchen cabinets professionally with a sprayer, work with laminate surfaces, and determine whether or not to sand, but with the correct planning and methods, you can get amazing results. The outcome of this project is a gorgeously updated kitchen that may significantly improve the appearance and feel of your house. However, it does demand patience and close attention to detail. You will be well on your way to obtaining a polished finish that will last for years to come if you adhere to our thorough guide.


Comments
Post a Comment